
Ingredients
Equipment
Method
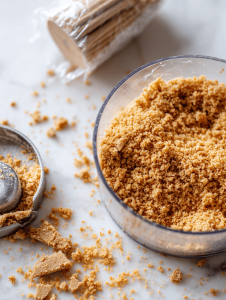
- Crush graham crackers into fine crumbs using a food processor or by placing them in a sealed bag and smashing with a rolling pin.
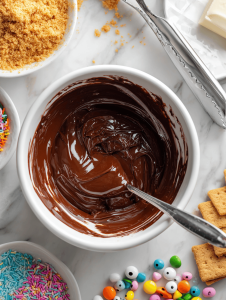
- In a microwave-safe bowl, melt the chocolate or candy coating in 30-second intervals, stirring after each, until smooth and glossy.
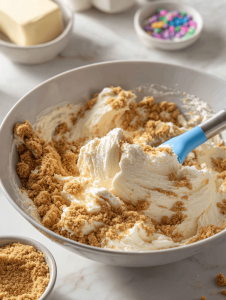
- In a mixing bowl, combine the graham cracker crumbs and softened cream cheese, mixing until the mixture is evenly coated and holds together when pressed.
- Using a cookie scoop or small spoon, portion out the mixture and roll into small balls about the size of a walnut, then place them on a baking sheet lined with parchment paper.

- Insert a stick into the center of each ball, then chill in the fridge for at least 30 minutes to firm up.

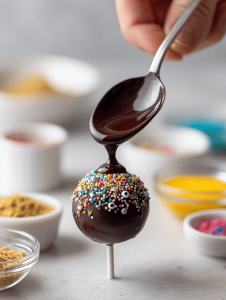
- Once chilled, dip each cake pop into the melted coating, tapping gently to remove excess, and place them in a styrofoam block or cake pop stand to set.

- Decorate the coated pops with sprinkles, edible eyes, or other spooky decorations before the coating hardens completely.

- Allow the decorated cake pops to set completely at room temperature or in the fridge for a quick firm-up.
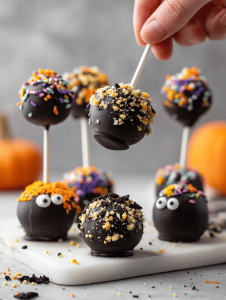
- Once the coating is shiny and firm, enjoy your festive Halloween cake pops, perfect for sharing or as a spooky treat!
Notes
For extra spooky effects, tint the coating with gel food coloring before dipping. Keep the coating warm but not too hot to prevent melting or streaks.