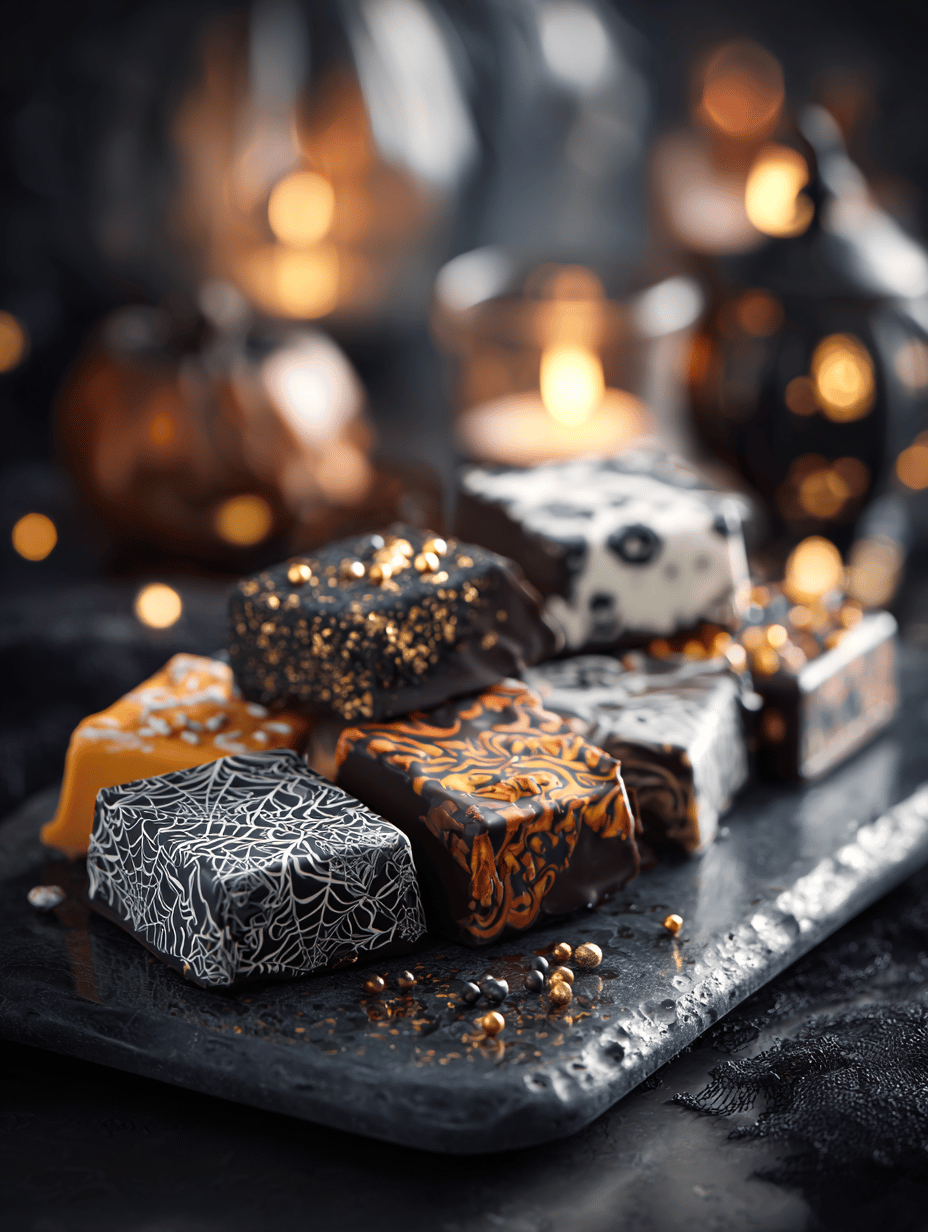
Halloween is the only time I get to really lean into spooky elegance with treats. This bark is about more than just sugar—it’s a moment to play with textures and colors that scream October. It’s messy, a little chaotic, but so worth the effort when you see those gleaming shards. Plus, it’s a fun way to involve kids or friends in the chaos.
Why This Halloween Bark is My Go-To
It’s a canvas for chaos—layers of flavor, textures, and colors. The process is forgiving, and the result always turns out stunningly imperfect. Plus, it’s a quick project that feels festive without fuss, making it perfect for last-minute spooky surprises.
What Goes Into Halloween Bark? A Breakdown
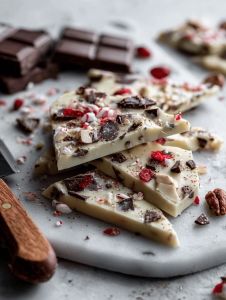
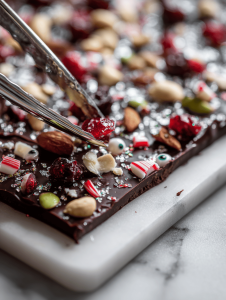
- Dark chocolate: Rich and smooth, it’s the base that makes everything decadent. Swap with milk or white chocolate if you prefer a milder flavor.
- Mixed nuts: Adds crunch and a salty balance. Pecans or almonds work great—skip if nut allergies are an issue.
- Dried cranberries: Oozy bursts of tartness that pop in every bite. Dried cherries are a good swap.
- Crushed candy canes: The iconic holiday crunch, with a peppermint zing. Use peppermint bark for extra flavor.
- Optional glitter or edible eyes: Make it spooky and fun, perfect for the season’s vibe.
Tools of the Trade for Halloween Bark
- Heatproof mixing bowl: Melts chocolate evenly over simmering water.
- Spatula: Spreads melted chocolate smoothly onto the baking sheet.
- Baking sheet with parchment: Provides a sturdy base for the bark to set.
- Knife or kitchen shears: Breaks the set bark into rustic pieces.
Crafting the Perfect Halloween Bark: Step-by-Step
Step 1: Line a baking sheet with parchment paper.
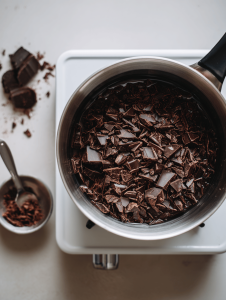
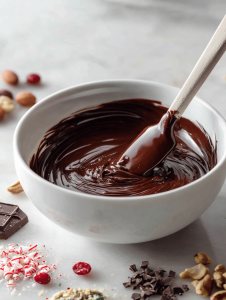
Step 2: Melt dark chocolate in a heatproof bowl over simmering water, stirring until smooth.
Step 3: Pour melted chocolate onto the prepared sheet, spreading it evenly with a spatula.
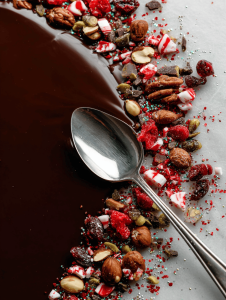
Step 4: Sprinkle with mixed nuts, dried cranberries, and crushed candy canes while still warm.
Step 5: Let the bark set at room temperature for at least 2 hours, or refrigerate for quicker firming.
Step 6: Once solid, break into irregular pieces using your hands or a knife.
Watch These Details for Perfect Halloween Bark
- Chocolate should be fully melted and smooth, not grainy or clumpy.
- Toppings should be pressed lightly into the chocolate to prevent sliding off.
- Bark needs at least 2 hours at room temp or longer in fridge to fully set.
- Edges should be crisp and clean when broken apart, not crumbly or soft.
Common Pitfalls and How to Fix Them
- Chocolate seizes or becomes grainy.? MELTED CHOCOLATE IS GRAINY? → Remove from heat earlier, stir constantly, and use high-quality chocolate.
- Toppings fall off or sink in.? TOPPINGS SLIDING OFF? → Gently press toppings into the warm chocolate, not just sprinkle.
- Bark remains soft and bendy.? BARK IS TOO SOFT? → Let it set longer at room temp or in fridge.
- Uneven thickness or cracked edges.? SETTINGS AREN’T EVEN? → Use a level surface and avoid drafts during setting.
Halloween Bark
Ingredients
Equipment
Method
- Line a baking sheet with parchment paper to prepare for pouring the melted chocolate.
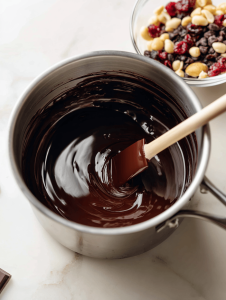
- Place the chopped dark chocolate in a heatproof bowl and set it over a pot of simmering water, making sure the bottom of the bowl doesn't touch the water.
- Stir the chocolate gently with a spatula until it’s completely melted and smooth, with a glossy finish and no lumps.
- Pour the melted chocolate onto the prepared parchment-lined baking sheet and use the spatula to spread it evenly into a thin layer.
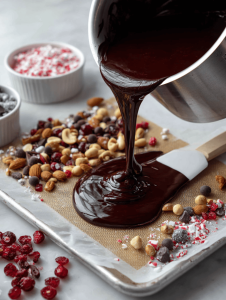
- Sprinkle the mixed nuts, dried cranberries, and crushed candy canes evenly over the warm chocolate, pressing them lightly into the surface to help them stick.
- Allow the bark to set at room temperature for at least 2 hours, or place it in the refrigerator for about 1 hour for quicker setting.
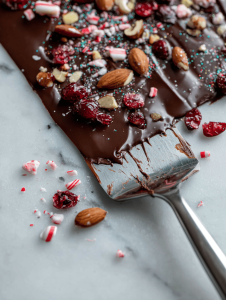
- Once the chocolate has fully hardened and is firm to the touch, break the bark into rustic, irregular pieces using your hands or a sharp knife.
- If desired, decorate with edible glitter or spooky edible eyes to add a fun, festive touch before serving.
Notes

Hi, I’m Daniel Whitaker, the voice and recipe developer behind Broth Psychologist. I’m so glad you’re here. This little corner of the internet started as a way for me to share comfort through cooking, but it has grown into something much deeper.
 Hi, I’m Daniel Whitaker, the voice and recipe developer behind Broth Psychologist. I’m so glad you’re here.
This little corner of the internet started as a way for me to share comfort through cooking, but it has grown into something much deeper.
It’s where food meets feeling, and where simple ingredients tell meaningful stories.
Hi, I’m Daniel Whitaker, the voice and recipe developer behind Broth Psychologist. I’m so glad you’re here.
This little corner of the internet started as a way for me to share comfort through cooking, but it has grown into something much deeper.
It’s where food meets feeling, and where simple ingredients tell meaningful stories.


