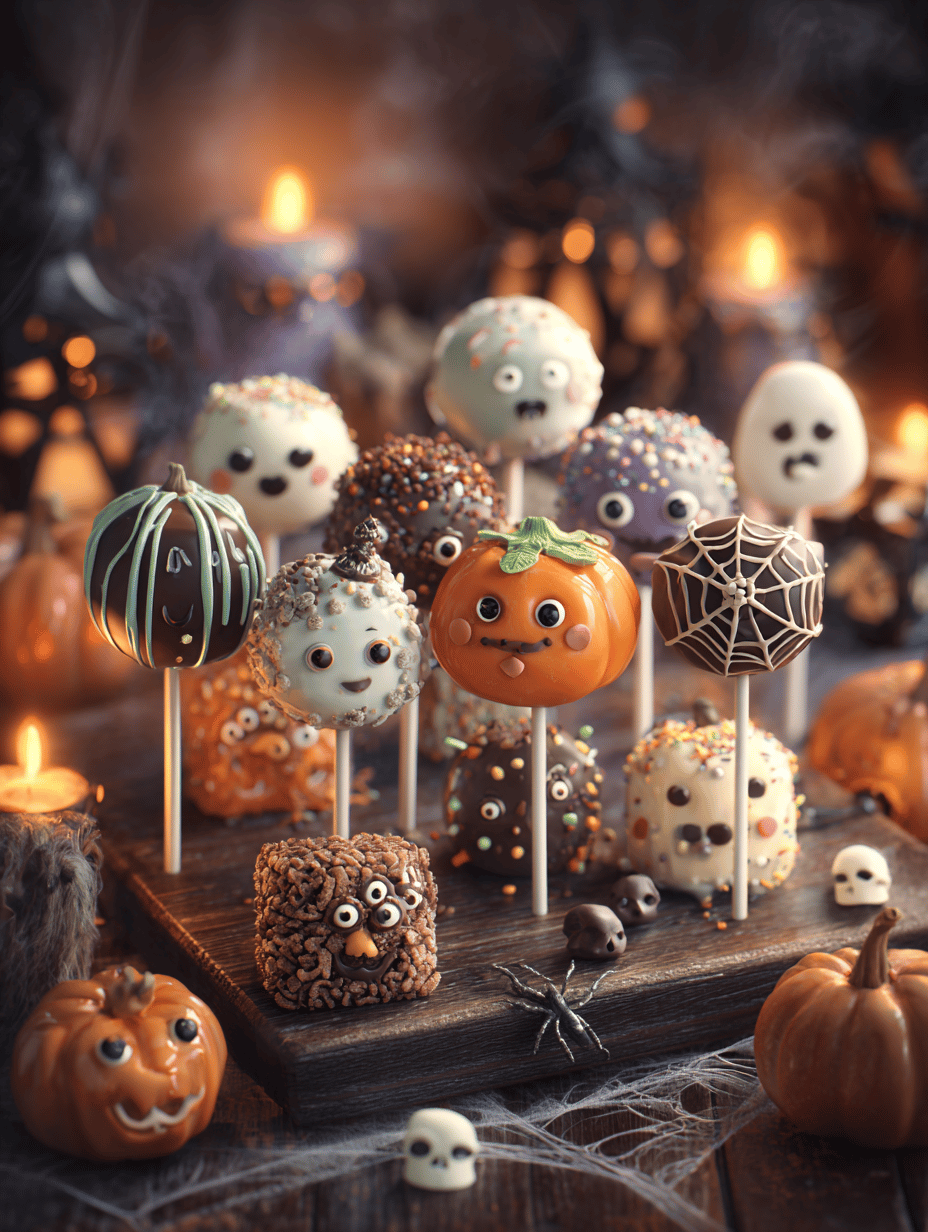
Halloween cake pops are a quirky way to transform simple ingredients into something delightfully spooky. They’re not just for kids; they’re a playful, edible craft that invites your inner decorator to come out and play. Plus, they let you sneak in a bit of nostalgia, with familiar flavors turned into tiny, portable treats.
Why I keep coming back to Halloween cake pops
They blend creativity with simplicity, turning a basic treat into a spooky masterpiece. Each batch offers a new chance to experiment with colors, faces, and themes. Plus, they’re utterly portable, perfect for sharing or sneaking one after a long day. They remind me that sometimes, the messiest moments in the kitchen make for the sweetest memories.
Breaking down the spooky ingredients
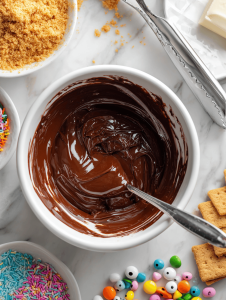
- Chocolate or Candy Coating: It’s the magic layer, glossy and sweet. Use good quality for the best shine; swap with white chocolate or almond bark if needed.
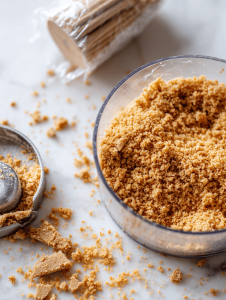
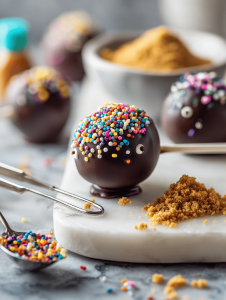
- Graham Crackers: Adds nostalgic crunch, easy to crush into fine crumbs. Gluten-free versions work, but they may alter the flavor slightly.
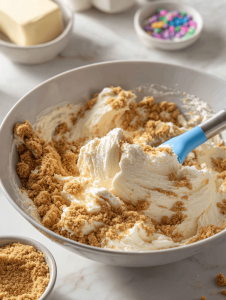
- Cream Cheese: Binding agent that’s slightly tangy and rich. Can substitute Greek yogurt for a healthier twist, but it’s a bit softer.
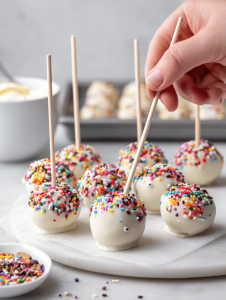
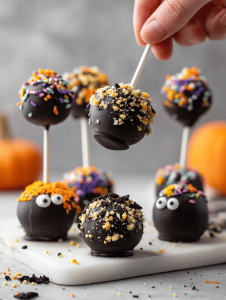
- Decorative Sprinkles: Your palette for spooky designs. Choose edible eyes, shimmer dust, or themed sprinkles to heighten the Halloween vibe.
- Cake Balls Base (Optional: Cake crumbs, frosting): If you prefer a more traditional base, use leftover cake mixed with frosting. It’s moist, rich, and binds well.
- Sticks: Wooden or paper straws work fine. Wooden sticks give a sturdier hold, especially for larger pops.
- Food Coloring (Optional): For customizing your coating—aim for gel-based to avoid thinning the coating too much.
Tools and equipment for spooky cake pop magic
- Microwave-safe bowl: For melting chocolate or candy coating evenly.
- Cookie scoop or small spoon: To portion out even-sized cake balls.
- Styrofoam block or cake pop stand: To hold pops upright while they set and decorate.
- Decorating brushes or toothpicks: For detailed decorating and fixing small imperfections.
Step-by-step guide to spooky perfection
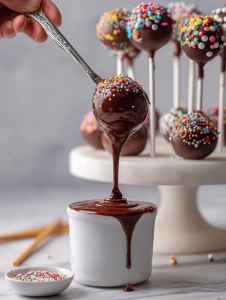
Step 1: Start by melting your chocolate until smooth and glossy, about 2 minutes in the microwave, stirring every 30 seconds.
Step 2: Crush graham crackers into fine crumbs—this gives the cake pops a nostalgic, cookie-like crunch.
Step 3: Mix the crumbs with a bit of cream cheese until it holds together, then roll into small balls, about the size of a walnut.
Step 4: Insert a stick into each ball, then chill in the fridge for at least 30 minutes — they need to be firm before dipping.
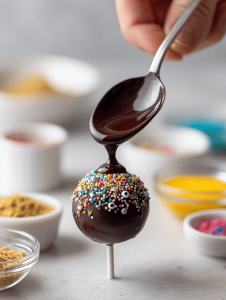
Step 5: Melt your candy coating, watching for a shiny, smooth finish. Dip each pop, tap off excess, then decorate with spooky sprinkles or edible eyes.
Cooking checkpoints and tips for Halloween cake pops
- Ensure the cake balls are cold and firm before dipping to avoid cracks.
- Watch the candy coating melt — too hot, and it’ll be thin and runny; too cool, and it won’t coat properly.
- Decorate quickly after dipping — the coating firms up fast, trapping your decorations.
- If coating looks dull, reheat briefly and stir until shiny again.
Common mistakes and how to fix them
- Clumpy coating that won’t coat smoothly.? USE TOO MUCH CANDY COATING, it pools and drips. Fix by thinning with a tiny splash of vegetable oil.
- Cake balls falling apart during dipping.? DIPPED CAKE POPS AND THEY SLID OFF THE STICK. Chill the balls longer, or dip the sticks in coating first.
- Dull, streaky coating.? OVERHEATED CHOCOLATE, it’s thickened and dull. Stir in small amounts of vegetable oil or coconut oil.
- Soft or misshapen cake pops.? NOT CHILLING ENOUGH, pops are greasy or misshapen. Chill the formed balls for 30 mins before dipping.
Halloween Cake Pops
Ingredients
Equipment
Method
- Crush graham crackers into fine crumbs using a food processor or by placing them in a sealed bag and smashing with a rolling pin.
- In a microwave-safe bowl, melt the chocolate or candy coating in 30-second intervals, stirring after each, until smooth and glossy.
- In a mixing bowl, combine the graham cracker crumbs and softened cream cheese, mixing until the mixture is evenly coated and holds together when pressed.
- Using a cookie scoop or small spoon, portion out the mixture and roll into small balls about the size of a walnut, then place them on a baking sheet lined with parchment paper.

- Insert a stick into the center of each ball, then chill in the fridge for at least 30 minutes to firm up.
- Once chilled, dip each cake pop into the melted coating, tapping gently to remove excess, and place them in a styrofoam block or cake pop stand to set.
- Decorate the coated pops with sprinkles, edible eyes, or other spooky decorations before the coating hardens completely.
- Allow the decorated cake pops to set completely at room temperature or in the fridge for a quick firm-up.
- Once the coating is shiny and firm, enjoy your festive Halloween cake pops, perfect for sharing or as a spooky treat!
Notes

Hi, I’m Daniel Whitaker, the voice and recipe developer behind Broth Psychologist. I’m so glad you’re here. This little corner of the internet started as a way for me to share comfort through cooking, but it has grown into something much deeper.
 Hi, I’m Daniel Whitaker, the voice and recipe developer behind Broth Psychologist. I’m so glad you’re here.
This little corner of the internet started as a way for me to share comfort through cooking, but it has grown into something much deeper.
It’s where food meets feeling, and where simple ingredients tell meaningful stories.
Hi, I’m Daniel Whitaker, the voice and recipe developer behind Broth Psychologist. I’m so glad you’re here.
This little corner of the internet started as a way for me to share comfort through cooking, but it has grown into something much deeper.
It’s where food meets feeling, and where simple ingredients tell meaningful stories.


