There’s something deeply satisfying about tearing into ribs that are sticky, caramelized, and smoky all at once. This recipe is about that tactile joy—getting your hands dirty, feeling the tender meat give way, and tasting that perfect balance of sweet, savory, and a hint of spice. It’s a messy, honest kind of eating that brings people together around the table.
What makes these pork ribs special isn’t just the flavor—though that’s a big part—it’s the process. Slow-cooking them until the glaze turns to a sticky sheen, then finishing with a quick broil or grill, creates a crust that crackles when you bite. It’s a no-fuss, down-to-earth method that rewards patience with rich, layered bites that linger long after the plate’s empty.
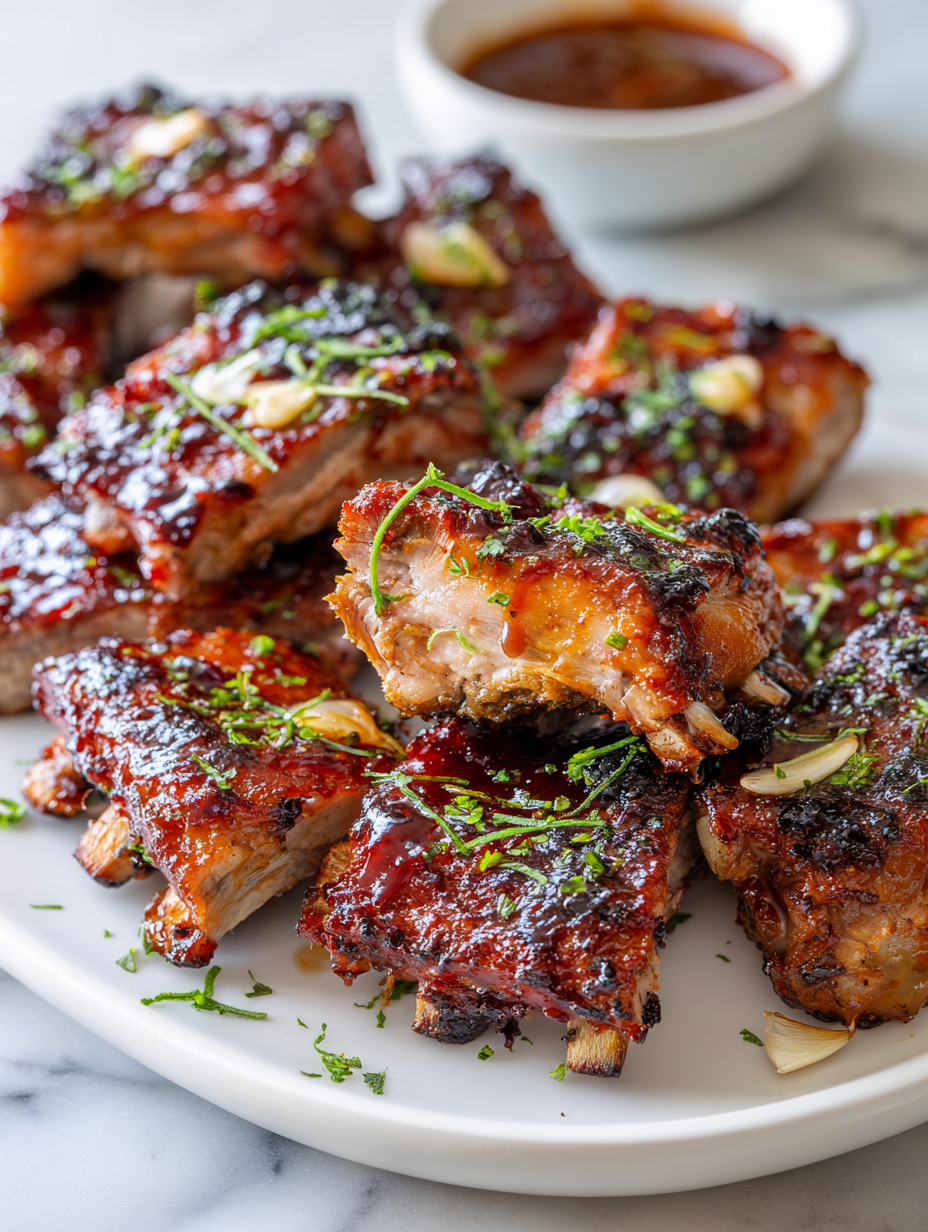
Focusing on the sticky, caramelized glaze that develops during slow cooking, this recipe emphasizes the tactile pleasure of tearing into ribs with your hands, savoring the smoky sweetness and chewy edges that tell a story of patience and rustic comfort.
The tactile joy of sticky ribs
- The first time I got that perfect sticky glaze, I felt like I’d unlocked a secret to comfort food.
- Nothing beats the chaos of pulling ribs apart with your hands, juices, and caramelized bits sticking to your fingers.
- I still get nostalgic thinking about the smoky aroma filling the kitchen, reminding me of family gatherings.
- There’s a quiet pride in mastering that slow, gentle simmer until the meat just falls apart.
- Sometimes, I crave these ribs after a long day—simple, honest, and deeply satisfying.
The tactile joy of sticky ribs
I stumbled on this sticky pork ribs recipe during one of my late-night fridge raids, hunting for something comforting but no-fuss. The magic happened when I realized how slow-cooking the ribs with a simple, sweet glaze turns ordinary meat into something almost addictive. Now, it’s my go-to for weekends when I want to impress without too much fuss, and it always reminds me of lazy summer barbecues, even if I’m just in my own backyard.
Trivia and Origins of Sticky Ribs
- Pork ribs have been a staple in various cultures, from American barbecue traditions to Asian slow-cooking methods.
- The term ‘sticky ribs’ often refers to the caramelized, sugary glaze that became popular in American BBQ in the 20th century.
- Historically, slow-cooking ribs with sweet sauces was a way to tenderize tougher cuts before the rise of modern grilling techniques.
- The use of molasses, honey, or brown sugar in rib glazes has roots in colonial American cooking, blending indigenous and immigrant influences.
- In many Asian cuisines, similar sticky, sweet sauces are used with pork to create flavor-packed, glossy finishes that cling to the meat.
Ingredient breakdown: key components
- Pork ribs: I prefer baby back ribs for their tenderness and quicker cook time, but spare ribs bring a richer, meatier bite—choose based on your mood and patience for slow cooking.
- Brown sugar: I use dark brown sugar for that deep, molasses-y sweetness that caramelizes beautifully, but honey can be a quick swap if you want a brighter, floral note.
- Soy sauce: Adds umami and saltiness, which balances the sweetness. If you’re gluten-free, coconut aminos work well, though they lend a slightly different depth.
- Garlic: Fresh garlic is my go-to for that pungent, savory hit that permeates the glaze. Dried garlic powder is fine if you’re out, but taste and adjust salt accordingly.
- Apple cider vinegar: Brightens the glaze with a zingy tang. Lemon juice can work as a quick substitute, but don’t skip the acidity—it’s what keeps the glaze lively and not cloying.
- Smoked paprika: For that subtle smoky depth without a grill. If you’re out, chipotle powder adds a fiery, smoky kick—use sparingly until you get the hang of it.
- Honey or maple syrup: I add just a touch for gloss and a hint of floral sweetness. Molasses can be used if you want richer, darker caramelization, but go easy—it’s potent.
Spotlight on key ingredients
Pork Ribs:
- I love the marbled fat and connective tissue that melt into tender, juicy bites, especially when slow-cooked. If you prefer leaner meat, try pork loin, but it won’t have the same richness.
- Brown sugar: I rely on dark brown sugar for that deep, almost molasses-like flavor that caramelizes into a sticky crust. If you’re out, honey can add sweetness, but it won’t develop quite the same depth.
Sauces & acids:
- Soy sauce: I use it for that salty, umami backbone that balances out the sweetness. It’s a bit smoky and savory, which makes the glaze stand out. Coconut aminos can replace it for a soy-free version, but the flavor is slightly milder.
- Apple cider vinegar: Adds a bright tang that keeps the glaze lively and prevents it from becoming too cloying. Lemon juice is a good quick substitute, but it’s less nuanced—just don’t skip the acidity.
Notes for ingredient swaps
- Dairy-Free: Swap honey or maple syrup for a splash of coconut milk-based syrup—expect a slightly less glossy finish, but still sweet and sticky.
- Low-Sugar: Replace brown sugar with a sugar-free maple syrup or erythritol blend—note the glaze may be less caramelized, but still flavorful.
- Gluten-Free: Use coconut aminos instead of soy sauce for a salty umami punch—this swap keeps it soy-free without sacrificing depth.
- Sweetener: Substitute molasses or dark corn syrup for honey or maple—these add richness and a deep caramel note, though they may darken the glaze more.
- Vinegar: Lemon juice or rice vinegar can replace apple cider vinegar—just a bright, tangy kick without the fruitiness, keep in mind the acidity level.
- Paprika: Use smoked chipotle powder for extra smoky heat—adjust quantity to balance spice and smokiness, but it adds a fiery depth.
- Ribs: For beef short ribs, adjust cooking time; they need longer to become tender but deliver a richer, beefier flavor.
Equipment & Tools
- Large roasting pan or baking sheet: To hold the ribs during baking and ensure even heat distribution.
- Wire rack: Elevate the ribs for proper air circulation and caramelization.
- Basting brush: Apply the glaze evenly on all sides.
- Sharp knife or paper towel: Remove the membrane for tender, juicy ribs.
- Aluminum foil: Tent the ribs during resting to keep warm.
Step-by-step guide to sticky pork ribs
- Equipment & Tools: Use a large roasting pan or baking sheet with a wire rack for even heat circulation. Have a basting brush handy for applying glaze.
- Preheat your oven to 150°C (300°F). Pat the ribs dry with paper towels to remove excess moisture, which helps the glaze stick.
- Remove the thin membrane from the back of the ribs using a paper towel for grip; this step ensures tender, melt-in-your-mouth meat.
- Mix your glaze: combine equal parts soy sauce, honey, and brown sugar in a bowl. Add minced garlic, smoked paprika, and a splash of apple cider vinegar. Whisk until smooth.
- Place the ribs on the wire rack over the baking sheet. Brush generously with the glaze, making sure to coat all sides evenly.
- Bake uncovered for about 2.5 to 3 hours. Every 30 minutes, re-glaze and turn the ribs to build up that sticky, caramelized surface.
- Check for doneness: the meat should be tender and slightly pulling away from the bones. The glaze will be thick and glossy.
- For extra caramelization, turn on the broiler for 3–5 minutes. Watch carefully to prevent burning; the ribs should shimmer with a sticky, crackly crust.
- Rest the ribs for 10 minutes after removing from the oven. Tent loosely with foil to keep warm and let the juices redistribute.
- Serve hot, tearing into the sticky, tender meat with your hands. The edges should be caramelized and slightly charred, offering a smoky aroma and a crackly bite.
Let the ribs rest covered loosely with foil for 10 minutes. Then, tear and serve directly, enjoying the sticky, smoky bites with your hands for maximum tactile pleasure.
How to Know It’s Done
- Meat pulls away from bones easily, indicating tenderness.
- Glaze is thick, shiny, and crackling at edges during broiling.
- Internal probe temp reaches 70°C (160°F) for safety and optimal doneness.
Sticky Smoked Pork Ribs
Ingredients
Equipment
Method
- Preheat your oven to 150°C (300°F). Pat the ribs dry with paper towels to remove excess moisture, which helps the glaze stick better.
- Carefully slide a sharp knife or use a paper towel to remove the thin membrane from the back of the ribs; this step ensures the meat becomes tender and melts in your mouth.
- In a bowl, whisk together dark brown sugar, soy sauce, minced garlic, apple cider vinegar, smoked paprika, and honey until the mixture is smooth and fragrant.
- Place the ribs on a wire rack set over a baking sheet, then generously brush the glaze onto all sides of the ribs, making sure every nook and cranny is coated evenly.
- Slide the pan into the oven and bake uncovered for about 2.5 to 3 hours. Every 30 minutes, remove the ribs, reapply the glaze with a basting brush, and turn them to build up a sticky, caramelized surface.
- Once the meat is tender and pulling away from the bones, turn on the broiler for 3–5 minutes to create a crackly, glossy crust. Keep a close eye to prevent burning—they should shimmer with a sticky glaze.
- Remove the ribs from the oven and tent loosely with foil. Let them rest for 10 minutes, allowing the juices to redistribute and the glaze to set into a shiny, crackly crust.
- Finally, tear into the ribs with your hands, enjoying the sticky, smoky bites that crackle as you chew. Serve immediately with your favorite sides and savor the rich, layered flavors.
Pro tips for sticky ribs
- Bolded mini-head: Use a clean, stiff brush to apply the glaze evenly, avoiding drips and uneven caramelization.
- Bolded mini-head: Keep the oven temperature steady at 150°C (300°F) to develop a sticky, tender texture without drying out.
- Bolded mini-head: Re-glaze every 30 minutes during baking to build layers of caramelized sweetness and prevent burning.
- Bolded mini-head: Turn the ribs halfway through cooking to ensure the glaze caramelizes uniformly on all sides.
- Bolded mini-head: Broil the ribs briefly at the end—watch closely—to crackle the glaze into a glossy, crackly crust.
- Bolded mini-head: Rest the ribs loosely covered with foil for at least 10 minutes after baking to let the juices settle and improve tenderness.
Common mistakes and how to fix them
- FORGOT to check internal temperature → Use a thermometer to avoid undercooked ribs.
- DUMPED the marinade prematurely → Let ribs marinate at least 2 hours for flavor depth.
- OVER-TORCHED during broil → Watch ribs closely; use a timer to prevent burning.
- MISSED resting time → Rest ribs 10 minutes for juices to redistribute and enhance tenderness.
Fast fixes for sticky ribs
- If ribs are too dry → Splash with a little apple cider vinegar before reheating for moisture.
- When glaze isn’t sticky enough → Brush on a quick layer and broil for 2-3 minutes.
- If sauce is burnt → DUMP the charred bits, add fresh glaze, and keep a close eye during broil.
- When ribs stick to the pan → Patch with parchment paper or foil to prevent tearing when serving.
- Splash soy sauce or honey from pantry if glaze lacks depth and shine—quick fix for flavor boost.
Prep, store, and reheat tips
- You can prep the ribs a day ahead by seasoning and marinating them in the fridge; the flavors deepen overnight, and the meat absorbs all that smoky-sweet goodness.
- Store cooked ribs in an airtight container in the fridge for up to 3 days. Reheat gently in the oven at 150°C (300°F) covered with foil until warmed through, about 20 minutes—look for that sticky sheen to reappear.
- If freezing leftovers, wrap ribs tightly in plastic wrap and foil; they’ll keep for up to 2 months. Thaw overnight in the fridge and reheat as above, expecting a slightly softer texture but still richly flavored.
- Reheating releases some of the sugars’ caramel notes, so expect a slightly sticky, gooey texture with intensified smoky aroma. A quick broil at the end can revive that crackly, caramelized crust, if needed.
Top questions about sticky pork ribs
1. How do I pick the best pork ribs?
Look for ribs with good marbling and firm meat. The smell should be fresh and porky, not sour or off-putting.
2. How do I know when the ribs are done?
Cook until the meat is tender and falling off the bone, usually about 2.5 to 3 hours at 150°C (300°F).
3. How do I get that crackly glaze?
Broil for 3-5 minutes until the glaze is crackly and caramelized, but watch closely to avoid burning.
4. Should I rest the ribs after cooking?
Let the ribs rest for 10 minutes loosely covered with foil, so the juices redistribute and stay moist.
5. How do I reheat leftover ribs?
Reheat in a low oven (150°C/300°F) covered with foil until warmed through, about 20 minutes, until the glaze shimmers.
6. What internal temperature should pork ribs reach?
Use a meat thermometer to ensure internal temp reaches 70°C (160°F), for safety and tenderness.
7. What if the glaze isn’t sticky?
If the glaze isn’t sticky enough, brush on more glaze and broil briefly, watching to prevent burning.
8. What equipment do I need?
Cook ribs on a wire rack over a baking sheet for even heat and caramelization.
9. How often should I glaze the ribs?
Apply glaze every 30 minutes during baking for layers of caramel and flavor, turning ribs to coat all sides.
10. What if my ribs turn out dry?
If the ribs are too dry, splash with a little vinegar or re-glaze and broil briefly to revive moisture and shine.
These sticky pork ribs are a testament to patience and the simple joy of honest cooking. The tactile experience of tearing into that caramelized, smoky crust is unlike anything else, especially when the glaze crackles at each bite.
Right now, with the season shifting and comfort food feeling more essential than ever, this dish offers both nostalgia and a satisfying challenge. It’s a messy, flavorful reminder that good things take time—and that sometimes, the best bites come from a little chaos in the kitchen.

Hi, I’m Daniel Whitaker, the voice and recipe developer behind Broth Psychologist. I’m so glad you’re here. This little corner of the internet started as a way for me to share comfort through cooking, but it has grown into something much deeper.
 Hi, I’m Daniel Whitaker, the voice and recipe developer behind Broth Psychologist. I’m so glad you’re here.
This little corner of the internet started as a way for me to share comfort through cooking, but it has grown into something much deeper.
It’s where food meets feeling, and where simple ingredients tell meaningful stories.
Hi, I’m Daniel Whitaker, the voice and recipe developer behind Broth Psychologist. I’m so glad you’re here.
This little corner of the internet started as a way for me to share comfort through cooking, but it has grown into something much deeper.
It’s where food meets feeling, and where simple ingredients tell meaningful stories.


