
Focusing on the texture of paneer cubes, this recipe is about perfecting that crispy, golden crust while keeping the inside soft and chewy. It’s a little trick that turns a simple ingredient into a satisfying snack or side that everyone reaches for. Once you get that crunch just right, it’s hard to go back to bland, rubbery paneer.
I’ve always loved how paneer can be transformed into something more than just a block. It’s about that contrast—crisp outside, tender inside—that makes each bite interesting. This recipe is my go-to when I want something quick, but still crave that satisfying texture that makes every meal feel special.
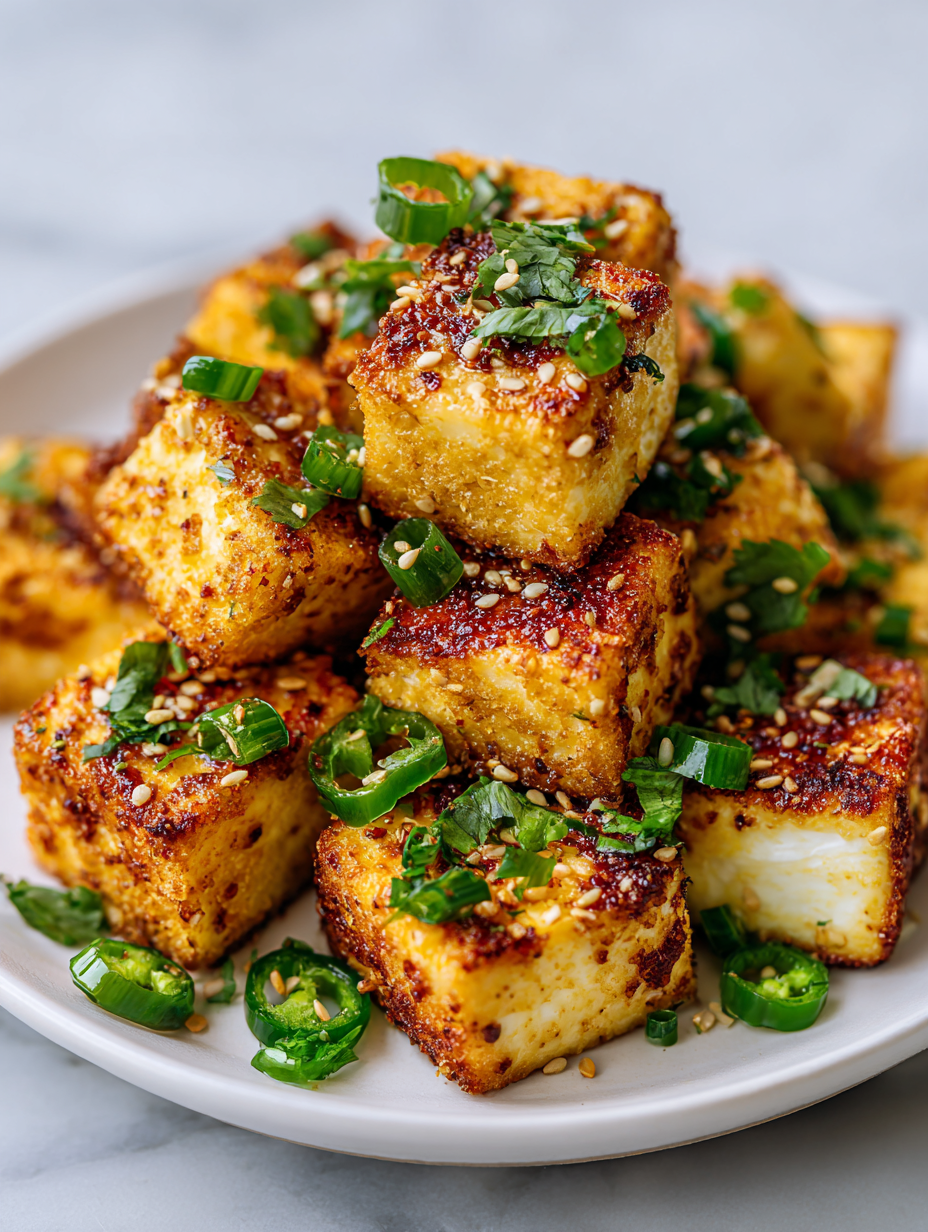
Focusing on the texture of paneer cubes and how their crispy, golden exterior contrasts with the soft, chewy interior, this recipe emphasizes achieving that perfect bite every time, making it more than just a simple snack or side.
Why This Recipe Matters
- This recipe was born out of a lazy weekend craving for something crispy and comforting. I remember the first time I accidentally overcooked paneer and discovered that golden, slightly charred edge that adds so much flavor. Since then, I’ve been chasing that perfect crunch without losing the tender bite inside.
- One chilly evening, I tossed together these cubes after a long day—no fancy ingredients, just pantry staples and a bit of patience. That first crispy bite brought back childhood memories of street snacks in India, where vendors serve up hot, crackling paneer with a squeeze of lemon. It’s funny how a simple snack can evoke nostalgia so suddenly.
- heading: ‘The story behind this recipe’
Ingredient breakdown: key components
- Paneer: I prefer using fresh, soft paneer for a tender bite, but if you want a firmer texture, opt for a slightly aged block. The fresh kind gives a melt-in-your-mouth feel, especially when crispy.
- Cornflour or arrowroot: This is my secret for that extra crisp exterior. Don’t skip it—it creates a light, crackly coating that’s so satisfying. Adjust the amount if you like it thicker or thinner.
- Spices: I usually toss in a pinch of turmeric and chili powder for color and heat. If you like more heat, add a dash of cayenne or paprika. Keep it subtle if you want to let the paneer shine.
- Oil: Use a neutral oil with a high smoking point like vegetable or sunflower oil. It should shimmer when hot but not smoke excessively. A good sizzle means your coating is crisping up perfectly.
- Lemon juice: A squeeze of lemon right after frying brightens the flavor and cuts through the richness. It’s a small step, but it lifts the entire dish with a fresh tang. Skip if you prefer a milder taste.
- Optional herbs: Fresh coriander or mint can be sprinkled on top for a burst of herbal freshness. I add it at the end to keep that vibrant, green pop against the golden cubes.
Spotlight on key ingredients
Paneer:
- I prefer fresh, soft paneer for that melt-in-your-mouth texture; it crisps beautifully if you handle it gently. If using pre-packaged, look for a slightly moist block for better tenderness.
- During frying, it develops a golden crust that crackles when you bite, contrasting with its chewy interior. It’s the balance of crispy and tender that makes this dish special.
Cornflour:
- My secret for that ultra-light crunch—when coated thinly, it turns into a delicate, crackly shell that’s almost airy. Too much, and it can become heavy or pasty.
- When frying, watch for a shimmering, slightly smoky aroma—indicating the coating is crisping up perfectly. If it smokes excessively, reduce heat immediately to avoid bitterness.
Notes for ingredient swaps
- Dairy-Free: Use firm tofu instead of paneer. It’s softer and absorbs flavors differently, but still satisfying.
- Gluten-Free: Cornstarch is key here, but rice flour can be an alternative. It’s a bit more delicate, so handle with care.
- Low-Fat: Swap out regular oil for a spray of avocado or a light coating of sesame oil. Expect a slightly less crispy exterior.
- Spice Level: Omit chili powder for a milder taste, or add a pinch of smoked paprika for a smoky undertone. Adjust to your heat preference.
- Citrus: Lime juice can replace lemon for a slightly different tang—more floral and zesty, but equally bright.
- Herbs: Fresh basil or dill can work instead of coriander or mint, adding a different herbal note and freshness.
- Crunch Coating: Panko breadcrumbs instead of cornstarch make for a chunkier, more rugged crunch. It’s a bit heartier but still delicious.
Equipment & Tools
- Non-stick or cast-iron skillet: For even frying and crisping
- Tongs: To flip and remove paneer safely
- Small bowl: Mixing cornstarch and spices
- Paper towel-lined plate: Drain excess oil
Step-by-step guide to crispy paneer
- Gather all equipment: a non-stick or cast-iron skillet, tongs, a small bowl, and a paper towel-lined plate. Purpose: tools for frying, flipping, draining, and drying.
- Cut the paneer into 1-inch cubes. Aim for uniform size to ensure even cooking and crispiness. Set aside.
- In a small bowl, mix 2 tablespoons of cornstarch with 1/4 teaspoon salt and optional spices like chili powder or turmeric. Purpose: creates a light, crispy coating.
- Pat the paneer cubes dry with a paper towel. Removing excess moisture is key for crispness.
- Toss the paneer cubes in the cornstarch mixture until evenly coated. Shake off excess to prevent clumping.
- Heat 2-3 tablespoons of neutral oil in your skillet over medium-high heat (about 180°C / 356°F). The oil should shimmer but not smoke.
- Carefully place the coated paneer cubes in the hot oil, leaving space between each. Do not overcrowd the pan. Cook for 2-3 minutes without moving, then flip. Aim for a golden-brown crust.
- Continue flipping until all sides are crispy and golden, about 5-6 minutes total. The cubes should jiggle slightly but hold their shape.
- Check for doneness: the exterior should be crisp and golden, with a slight crackle when pressed. The interior remains soft.
- Remove the paneer with tongs and transfer to a paper towel-lined plate. Let rest for 1-2 minutes to absorb excess oil.
- Finish with a squeeze of lemon or sprinkle with fresh herbs if desired. Serve immediately for the best crunch and flavor.
Let the paneer rest briefly on the paper towels. Serve hot, optionally garnished with herbs or a squeeze of lemon. Plate immediately for best texture.
How to Know It’s Done
- Oil shimmer: hot enough for frying, but not smoking.
- Color: golden and crispy on all sides.
- Texture: firm outside, soft inside when pressed gently.
Crispy Paneer Cubes
Ingredients
Equipment
Method
- Cut the paneer into uniform 1-inch cubes, ensuring they’re dry by patting with a paper towel. This step helps the coating stick and crisp up nicely.
- In a small bowl, mix the cornstarch with salt and chili powder, creating a light, seasoned coating ready to envelop each paneer cube.
- Toss the dry paneer cubes in the cornstarch mixture, shaking gently to ensure each piece is evenly coated with a thin, delicate layer.
- Heat the neutral oil in your skillet over medium-high heat until it shimmers—this indicates the right temperature for frying.
- Carefully place the coated paneer cubes in the hot oil, spacing them out to avoid overcrowding. You should hear a gentle sizzle as they hit the oil.
- Let the paneer fry undisturbed for about 2-3 minutes until the underside turns a deep golden brown, then flip each piece using tongs to cook all sides evenly.
- Continue frying, flipping as needed, until all sides are crisp and golden, about 5-6 minutes total. The cubes should make a crackling sound and develop a beautiful color.
- Remove the crispy paneer cubes with tongs and transfer them to a paper towel-lined plate to drain excess oil, letting them rest for a minute.
- Squeeze fresh lemon juice over the hot, crispy paneer cubes for a bright, tangy finish, and sprinkle with chopped herbs if desired.
- Serve immediately while they’re still warm, enjoying the satisfying crunch and tender interior with your favorite dips or sides.
Pro tips for crispy paneer cubes
- Use a hot pan—look for shimmering oil before adding paneer, for that perfect crunch.
- Coat lightly—shake off excess cornstarch to prevent clumping and ensure crispiness.
- Don’t overcrowd—the pan—give each cube space to fry evenly and develop a golden crust.
- Flip carefully—wait for a deep golden color before turning, to avoid tearing the coating.
- Rest briefly—on paper towels—so excess oil is absorbed, keeping the paneer crisp longer.
- Add lemon immediately—after frying—to brighten flavors and enhance the crispy contrast.
- Serve hot—right out of the pan—to enjoy the crunch at its best.
Common mistakes and how to fix them
- FORGOT to dry paneer before coating → Moisture prevents crispness, pat dry thoroughly.
- DUMPED too much oil in pan → Use just enough oil for a thin, even coating.
- OVER-TORCHED the coating → Reduce heat if coating blackens quickly, aim for golden.
- MISSED flipping at right time → Flip when crust is golden and firm, about 2-3 minutes per side.
Quick fixes and pantry swaps
- If oil smokes, splash a little water—pause, then reduce heat to prevent bitterness.
- When coating feels uneven, toss paneer again in cornstarch—quick fix for crispy results.
- Dump too much oil in pan? Use less next time—just enough for a thin, even fry.
- Over-torched coating? Shield with a lid, then turn down heat and keep an eye on color.
- Splash lemon right after frying—brightens flavor and crispness, even if you’re running late.
Prep, store, and reheat tips
- Prep the paneer cubes and coating mixture a day ahead; keep the coated cubes refrigerated to prevent moisture loss, which affects crispness.
- Store fried paneer in an airtight container in the fridge for up to 24 hours. Reheat in a hot pan until crispy again, listening for that satisfying crackle.
- The flavors deepen if you refrigerate the cooked paneer for a few hours; just reheat gently to restore crispness without overcooking.
- For longer storage, freeze cooked paneer cubes in a single layer. Reheat in a hot skillet or oven, aiming for a golden, crackling exterior and warm interior.
FAQs about Paneer Cubes
1. Can I use pre-packaged or older paneer?
Use fresh, firm paneer with a slightly moist texture for best crisping; dry it well before coating.
2. Can I substitute tofu for paneer?
Yes, tofu works as a vegan alternative, but it’s softer and won’t develop the same crust.
3. What oil is best for frying paneer?
Use a neutral oil like vegetable or sunflower that shimmers when hot; avoid olive oil which smokes easily.
4. How hot should the oil be for frying?
Aim for a temperature of about 180°C (356°F); the oil should shimmer but not smoke.
5. How do I get the crispiest coating?
Coat the paneer in a thin layer of cornstarch or arrowroot for a light, crispy exterior.
6. How do I know when the paneer is crispy enough?
Fry the cubes until they are golden on all sides, about 2-3 minutes per batch, avoiding overcrowding.
7. Can I reheat fried paneer?
Serve immediately to enjoy the crunch; reheat in a hot pan for a quick crisp-up if needed.
8. Should I add lemon after frying?
Yes, adding a squeeze of lemon post-frying brightens the flavor and enhances the crispness.
9. How long can I keep fried paneer?
Store leftovers in an airtight container in the fridge for up to a day; reheat in a hot skillet.
10. Why is my paneer not crispy?
Ensure to pat dry the paneer thoroughly to prevent excess moisture, which can make the coating soggy.
Crispy paneer cubes are more than just a snack; they remind me of lively street stalls and simple joys. When you bite into that crackling exterior, it’s satisfying in a way that lingers. These little bites have a knack for turning everyday moments into something a bit more special.
In the end, it’s about those small details—the right oil, patience, and a quick squeeze of lemon—that make this dish worth returning to. They’re perfect for sharing or simply savoring on a quiet evening. Sometimes, the simplest things are what stick with you the longest.