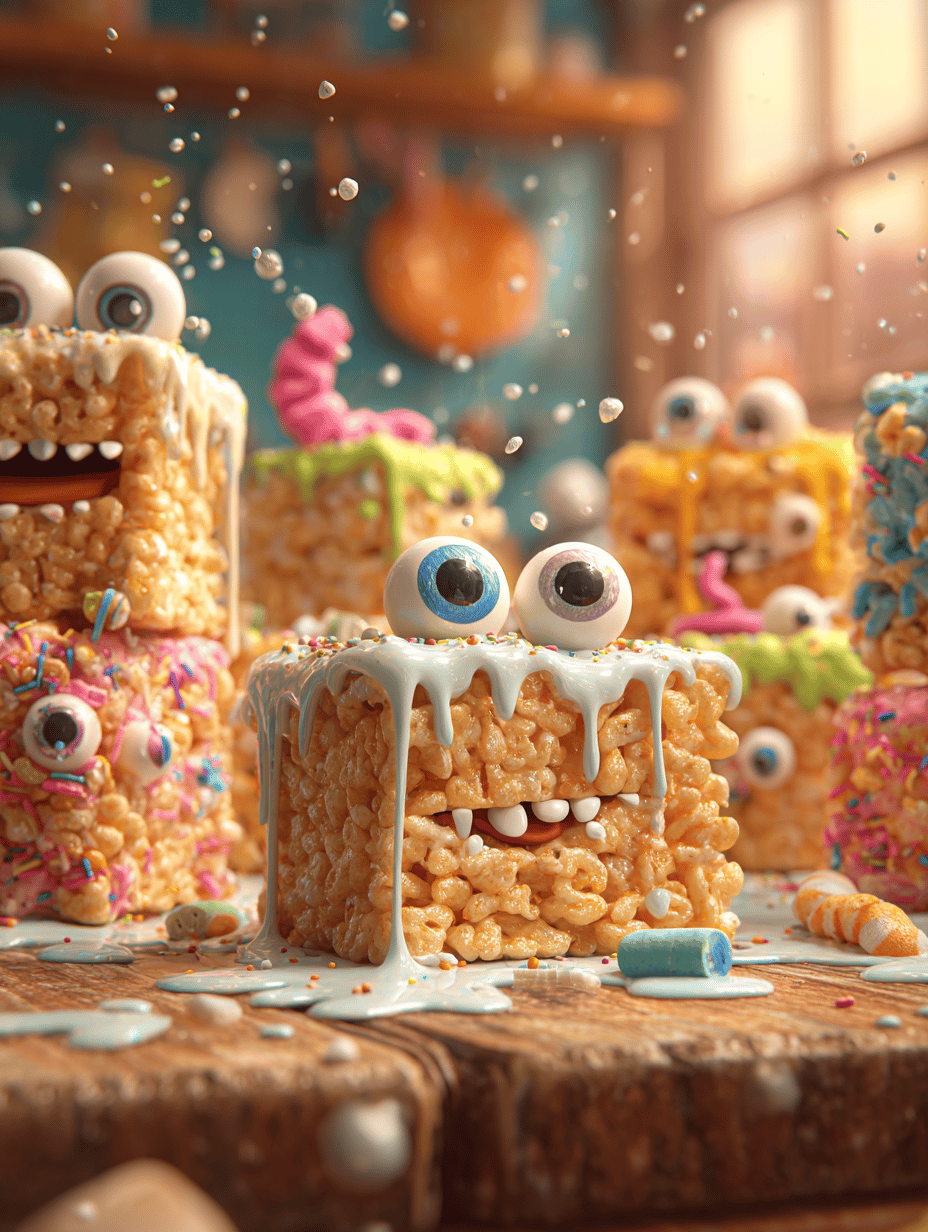
This recipe is my go-to for when I want something nostalgic but with a bit of a twist—monster-sized, chewy, and loaded with marshmallow goodness. There’s a chaotic joy in pressing down that gooey mass and knowing it will turn into a messy, satisfying treat. It’s a perfect way to channel childhood comfort while still customizing with your favorite add-ins.
Why I Keep Coming Back to This Recipe
It’s a forgiving recipe that turns out chewy, gooey treats every time, no matter how chaotic the process. The marshmallow smell fills the kitchen with nostalgia and a sense of calm. Plus, it’s so customizable—perfect for last-minute cravings or sharing with friends. These treats always make the house feel cozy, a little chaotic, and totally worth the mess.
Ingredients Breakdown & Substitutions
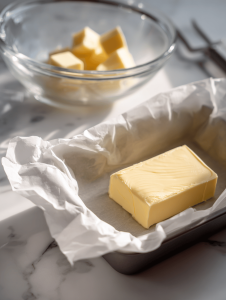
- Butter: Adds richness and helps marshmallows melt smoothly. Swap with coconut oil for a dairy-free version.
- Marshmallows: The gooey core. Vanilla-flavored or even caramel marshmallows can add extra flavor.
- Rice Krispies cereal: Gives the crunch. Try a gluten-free brand if needed, or substitute with puffed rice.
- Extras (optional): Chocolate chips, M&Ms, or dried fruit can personalize your treats.
- Salt (a pinch): Enhances sweetness and balances flavors. Skip if using salted butter.
Tools & Equipment for Monster Rice Krispie Treats
- 9×13 inch baking dish: To shape and hold the treats as they set.
- Large saucepan: To melt butter and marshmallows evenly.
- Sturdy spatula: To mix and press the mixture smoothly into the dish.
- Parchment paper: To prevent sticking and make cleanup easier.
Step-by-Step to Chewy, Gooey Monster Rice Krispie Treats
Step 1: Gather a 9×13 inch baking dish, some parchment paper, a large saucepan, and a sturdy spatula.
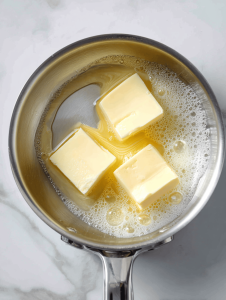
Step 2: Melt 3 tablespoons of butter over low heat in the saucepan until just shimmering, not bubbling.
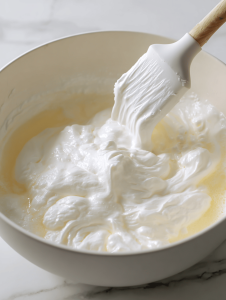
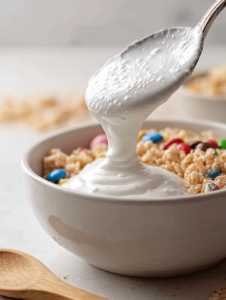
Step 3: Add 10 oz of marshmallows, stirring constantly until fully melted and smooth. Watch for a shiny, oozy texture.
Step 4: Remove from heat, then quickly stir in 6 cups of Rice Krispies cereal until evenly coated.
Step 5: Press the mixture into the prepared dish using a buttered spatula or wax paper, smoothing the top.
Step 6: Let sit at room temperature for at least 30 minutes, until firm but still chewy.
Cooking Checkpoints & Tips for Monster Rice Krispie Treats
- Marshmallows should be fully melted and glossy, not clumpy or stringy.
- The mixture should be easy to press but still sticky—if it feels too loose, chill it briefly before cutting.
- The top should be slightly golden, with a firm but chewy texture when pressed.
- Use a damp spatula to press the mixture into the pan for an even, tidy finish.
Common Mistakes & How to Fix Them
- Over-heating marshmallows, leading to a burnt flavor.? Melt marshmallows slowly on low heat to avoid burning.
- Pressing too hard, causing cracks and crumbling.? Press mixture firmly but gently to avoid breaking the treats.
- Cutting while still warm, which causes squishy edges.? Let treats cool fully before cutting.
- Treats sticking to knife, making clean cuts hard.? If treats are too sticky, chill briefly before slicing.
Monster Rice Krispie Treats
Ingredients
Equipment
Method
- Line your 9x13 inch baking dish with parchment paper for easy cleanup and set aside.
- Melt 3 tablespoons of butter in a large saucepan over low heat, stirring occasionally until just shimmering and melted. The butter should smell rich and slightly nutty.
- Add the marshmallows to the melted butter and stir constantly with a sturdy spatula until completely melted and the mixture becomes shiny and gooey. You’ll hear a gentle bubbling and see the marshmallows smoothly blending in.
- Remove the saucepan from heat and immediately pour in the Rice Krispies cereal. Stir quickly and gently to coat all the cereal evenly with the marshmallow mixture, creating a sticky, glossy mass.
- Using a buttered spatula or wax paper, press the mixture firmly and evenly into the prepared baking dish. You want a thick layer that’s pressed flat, but avoid pressing too hard to prevent cracking.

- Let the treats sit at room temperature for at least 30 minutes until they are set, firm, and slightly golden on top. This allows the marshmallow to cool and the treats to become chewy and satisfying.
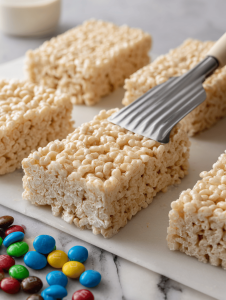
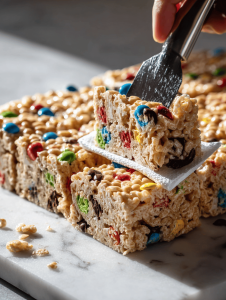
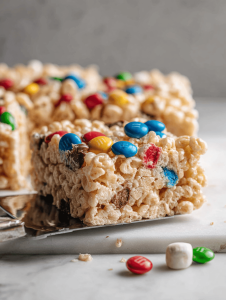
- Once cooled, use a sharp knife to cut into squares or rectangles, wiping the knife with a damp cloth between cuts for clean edges. The treats should be thick, chewy, and loaded with marshmallow goodness.
- Enjoy your monster-sized Rice Krispie treats! They’re perfect for sharing or indulging in nostalgic, gooey goodness.

Hi, I’m Daniel Whitaker, the voice and recipe developer behind Broth Psychologist. I’m so glad you’re here. This little corner of the internet started as a way for me to share comfort through cooking, but it has grown into something much deeper.
 Hi, I’m Daniel Whitaker, the voice and recipe developer behind Broth Psychologist. I’m so glad you’re here.
This little corner of the internet started as a way for me to share comfort through cooking, but it has grown into something much deeper.
It’s where food meets feeling, and where simple ingredients tell meaningful stories.
Hi, I’m Daniel Whitaker, the voice and recipe developer behind Broth Psychologist. I’m so glad you’re here.
This little corner of the internet started as a way for me to share comfort through cooking, but it has grown into something much deeper.
It’s where food meets feeling, and where simple ingredients tell meaningful stories.


