Every October, I find myself drawn to the kitchen to craft something that feels spooky yet familiar. Haunted house cookies are my go-to for that perfect mix of nostalgia and mischievous charm. They’re simple enough to make with kids or friends, but the decorating part makes them feel like a small art project.
What I love most is the way the smell of baking sugar and vanilla fills the house, stirring up memories and excitement. These cookies aren’t just for Halloween—they turn any night into a little celebration of the spooky season.
Why I Keep Coming Back to These Cookies
They’re endlessly customizable, and the process sparks childhood memories. The smell of baking sugar and vanilla is pure comfort. Plus, decorating them is a perfect balance of chaos and creativity that I find irresistible.
Haunted House Cookie Essentials and Variations
- Butter: Creamy and rich, helps create a tender cookie. Swap with margarine for a dairy-free version.
- Granulated sugar: Provides sweetness and crispness. Brown sugar adds moisture and a deeper flavor.
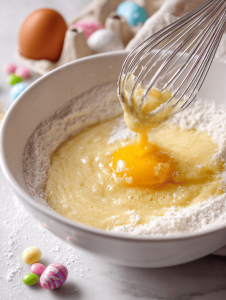
- Eggs: Bind the dough together. Use flaxseed meal mixed with water for vegan swaps.
- Vanilla extract: Adds warmth and depth. Lemon or almond extract can give a different aroma.
- All-purpose flour: The backbone of your dough, for structure. Whole wheat works if you want a nuttier taste.
- Decorative candies: Gummy or chocolate pieces turn cookies into haunted scenes. Use optional food coloring for extra creepiness.
- Icing and edible markers: For spooky details. Royal icing dries hard and smooth.
Tools and Tricks for Spooky Baking
- Mixing bowls: For creaming butter and mixing dough.
- Electric mixer or whisk: To blend ingredients smoothly.
- Baking sheet: To hold cookies during baking.
- Parchment paper: Prevent sticking and make cleanup easier.
- Decorating brushes and piping bags: For detailed spooky designs.
Step-by-Step to Spook-tacular Cookies
Step 1: Preheat your oven to 180°C (350°F).
Step 2: Line a baking sheet with parchment paper.
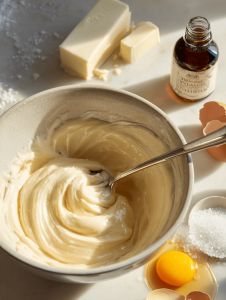
Step 3: Cream together butter and sugar until fluffy, about 3 minutes.
Step 4: Add eggs one at a time, mixing well after each.
Step 5: Stir in vanilla extract and a pinch of salt.
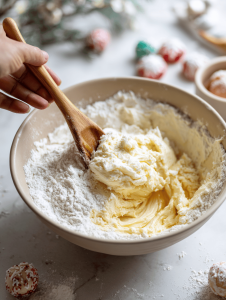
Step 6: Gradually add flour, mixing just until combined.
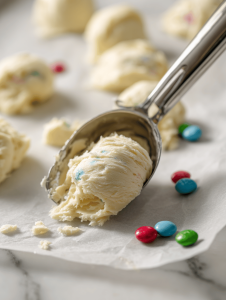
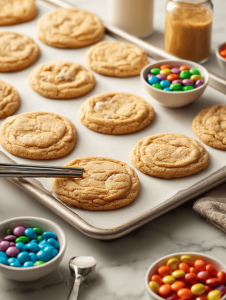
Step 7: Use a tablespoon to scoop dough onto your prepared sheet, spacing them apart.
Step 8: Bake for 10-12 minutes, until edges are golden but centers remain soft.
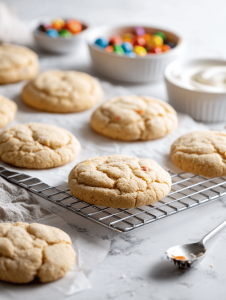
Step 9: Let cookies cool on the sheet for 5 minutes, then transfer to a wire rack.
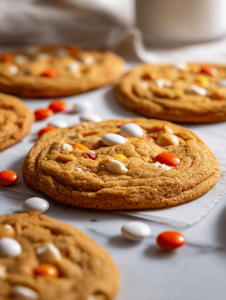
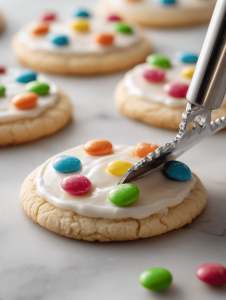
Step 10: Decorate with spooky icing or candies once fully cooled.
Checkpoints for Your Haunted Bakes
- Cookies should be golden around the edges but still soft in the middle.
- The aroma should be buttery with hints of vanilla and baking sugar.
- Cookies should crackle slightly when you tap the surface, indicating readiness.
Common Haunted House Cookie Mistakes & Fixes
- Cookies turn dark too quickly.? OVERRUNNING THE OVEN? Reduce baking time by a minute or two.
- Dough is too soft to shape.? Dough too sticky? Chill it for 30 minutes before scooping.
- Decorations sliding off.? Decorate before cookies are fully cooled to avoid melting icing.
- Overbaked cookies.? Forgot to set the timer? Check cookies at 10 minutes, edges should be golden.
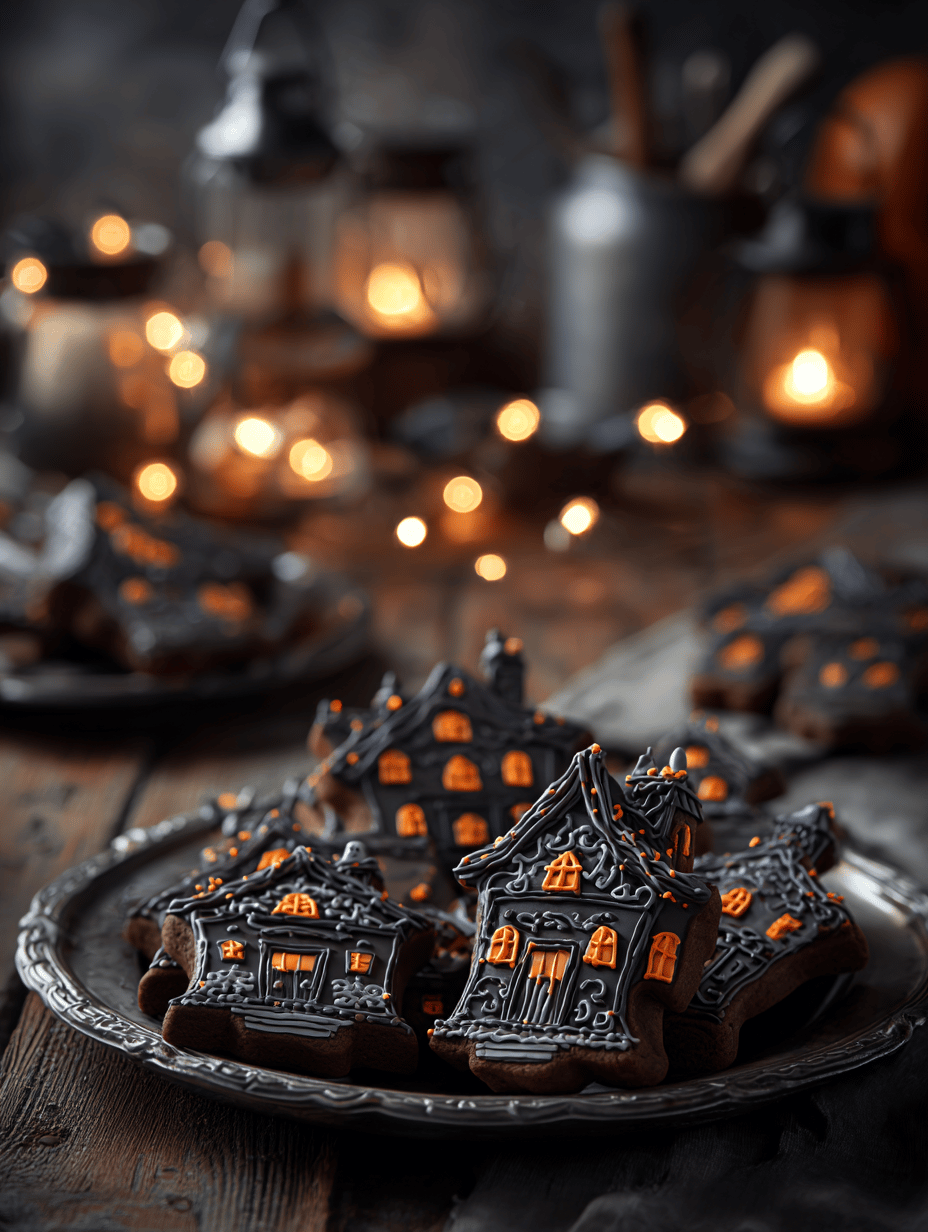
Haunted House Cookies
Ingredients
Equipment
Method
- Preheat your oven to 180°C (350°F) and line a baking sheet with parchment paper to prevent sticking.
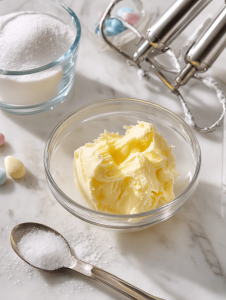
- In a large mixing bowl, beat softened butter and granulated sugar together with an electric mixer until the mixture is light and fluffy, about 3 minutes. You’ll notice the color lightening and the sound becoming airy.
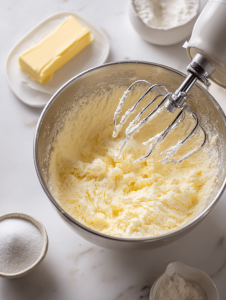
- Add the egg to the mixture and beat until fully incorporated, ensuring a smooth, slightly glossy batter.
- Stir in the vanilla extract, blending it into the batter to fill your kitchen with a warm, sweet aroma.
- Gradually add the flour to the wet ingredients, mixing on low speed or folding gently until the dough just comes together and is soft but manageable. The dough should be slightly sticky but firm enough to shape.
- Using a tablespoon or cookie scoop, portion out the dough onto the prepared baking sheet, spacing them a few inches apart to allow for spreading.
- Bake in the preheated oven for 10 to 12 minutes, or until the edges are golden brown and the cookies are set but still soft in the center. Your kitchen will be filled with a sweet, buttery scent.
- Remove the cookies from the oven and let them cool on the baking sheet for about 5 minutes. They will firm up slightly as they cool but remain tender.
- Transfer the cookies to a wire rack to cool completely before decorating. This ensures the icing adheres smoothly and doesn’t melt.
- Decorate the cooled cookies with spooky icing, adding gummy candies or chocolate pieces to create haunted scenes. Use piping bags for detailed designs or spread icing with a brush for quick decoration.

- Let the decorated cookies sit until the icing is fully set, then enjoy your festive, spooky treats that are perfect for celebrating the season!

Hi, I’m Daniel Whitaker, the voice and recipe developer behind Broth Psychologist. I’m so glad you’re here. This little corner of the internet started as a way for me to share comfort through cooking, but it has grown into something much deeper.
 Hi, I’m Daniel Whitaker, the voice and recipe developer behind Broth Psychologist. I’m so glad you’re here.
This little corner of the internet started as a way for me to share comfort through cooking, but it has grown into something much deeper.
It’s where food meets feeling, and where simple ingredients tell meaningful stories.
Hi, I’m Daniel Whitaker, the voice and recipe developer behind Broth Psychologist. I’m so glad you’re here.
This little corner of the internet started as a way for me to share comfort through cooking, but it has grown into something much deeper.
It’s where food meets feeling, and where simple ingredients tell meaningful stories.


