
Baking chicken cutlets might sound simple, but there’s a small art to keeping them juicy without turning to rubber. I’ve found that a gentle oven heat and a quick rest afterwards can make a real difference, especially when I want dinner on the table without fuss. It’s one of those tricks that feels like a quiet victory in the kitchen.
This approach is perfect for those nights when I don’t want to babysit a pan or worry about flipping and burning. Instead, I focus on seasoning and a bit of patience, trusting that the gentle heat will do the work. It’s surprisingly forgiving—no dry, tough bites, just tender, evenly cooked chicken that’s ripe for slicing onto salads or piling into sandwiches.
This recipe focuses on baking chicken cutlets in a way that keeps them juicy and tender, avoiding the dryness that often comes with overcooking. It’s about understanding the gentle heat of the oven and how to use it to your advantage, making this dish almost foolproof even for those who usually struggle with chicken.
A Gentle Oven Approach
- I love how this recipe turns out consistently juicy, even when I’m short on time.
- There’s a quiet satisfaction in knowing I don’t have to fuss with a pan and still get crispy edges.
- It reminds me of weekend family dinners, where simple, honest food feels just right.
- Baking these chicken cutlets has become my go-to for busy weeknights—no stress, just flavor.
A Gentle Oven Approach
This recipe for baked chicken cutlets came from a need for something reliable and forgiving after too many dry, overcooked attempts. I was once rushing through dinner, slicing into a chicken breast that was tougher than shoe leather—never again. Since then, I’ve perfected a method that keeps the chicken juicy, almost like a little secret I keep for busy nights. It’s simple, honest, and a reminder that sometimes gentle heat and a bit of patience do all the work.
Trivia and Historical Snippets
- Chicken cutlets became popular in the early 20th century as a quick, versatile protein for busy households.
- The term ‘cutlet’ derives from the French ‘côtelette,’ meaning a small rib or chop, though today it refers to thinly sliced meat.
- Baking chicken cutlets was once considered a European technique that migrated to American kitchens with immigrants seeking healthier cooking methods.
- In some regions, the technique of baking instead of frying was adopted during wartime rationing to stretch ingredients and reduce fat intake.
Key Ingredients and Tips
- Chicken breasts: I choose thick, boneless breasts for juiciness; slicing them thin helps them cook evenly. Skip this step, and they might dry out—so, trust the thickness.
- Breadcrumbs: I use plain, unseasoned breadcrumbs for a neutral crunch, but seasoned ones can add extra flavor if you prefer. Keep an eye on the coating’s color to avoid over-browning.
- Egg wash: Beaten eggs help the breadcrumbs stick and create a crispy crust. For a richer flavor, add a splash of milk or a pinch of paprika—just don’t skip it, or the coating might fall off.
- Olive oil: I drizzle a little over the breaded cutlets before baking for golden edges and a slight shimmer. If you want less fat, brush with butter instead, but expect a slightly softer crust.
- Seasonings: Salt, pepper, garlic powder—simple but essential. I also toss in a pinch of smoked paprika for a smoky aroma that wafts through the oven, making the kitchen smell cozy.
- Lemon: A squeeze of lemon after baking brightens the dish and cuts through the richness. Don’t forget this step—otherwise, it might feel flat on the palate.
Spotlight on key ingredients
Breadcrumbs:
- Chicken breasts: I pick thick, boneless breasts for juiciness; slicing thin helps even cooking. Skip this, and they might dry out—trust the thickness.
- I prefer plain, unseasoned breadcrumbs for a neutral crunch, but seasoned ones boost flavor. Watch their color to avoid over-browning.
- Olive oil: I drizzle a bit over the breaded cutlets before baking for a golden shimmer. For less fat, brush with butter—expect softer crust.
Egg wash:
- Lemon: I squeeze fresh lemon after baking to brighten flavors and cut richness. Don’t skip this—makes a noticeable difference in freshness.
- Beaten eggs help the crumbs stick and crisp up nicely. Add a splash of milk or paprika for extra flavor—don’t leave it out.
Notes for ingredient swaps
- Dairy-Free: Omit eggs and breadcrumbs containing dairy. Use plant-based alternatives, but expect a slightly different crust texture.
- Gluten-Free: Swap regular breadcrumbs for gluten-free ones. They might be a bit coarser but still give a nice crunch.
- Low-Sodium: Use unsalted breadcrumbs and reduce added salt. Your dish will be milder, so consider adding herbs for flavor.
- Herb Variations: Fresh thyme or rosemary can replace dried herbs. Adds a fragrant twist, but use sparingly so it doesn’t overpower.
- Citrus Zest: Add lemon or orange zest to breadcrumbs for extra brightness. Skip if you prefer a more neutral flavor.
- Oil Choices: Instead of olive oil, brush with avocado or coconut oil for different aroma and health benefits. Expect subtle flavor changes.
- Breadcrumb Texture: Use crushed crackers or cornflakes for crunch. These will alter the coating’s flavor and bite, so adjust seasoning accordingly.
Equipment & Tools
- Baking sheet: To hold the chicken for baking, lined for easy cleanup.
- Shallow dishes: For breading station—flour, eggs, breadcrumbs.
- Meat mallet or rolling pin: To pound chicken into even, thin cutlets if needed.
- Pastry brush or spoon: To lightly oil the cutlets before baking.
- Thermometer (optional): To check the internal temperature for doneness.
Step-by-step Baked Chicken Cutlets
- Preheat your oven to 190°C (375°F). Get a baking sheet ready, lined with parchment or a silicone mat for easy cleanup.
- Slice chicken breasts into thin, even cutlets—about 1/4 inch thick. If they’re uneven, gently pound thicker parts to even out the thickness.
- Set up your breading station: place flour in a shallow dish, beaten eggs in another, and seasoned breadcrumbs in a third. Salt, pepper, garlic powder—whatever you like.
- Dredge each chicken cutlet in flour, shaking off excess. Dip into the egg wash, then coat thoroughly with breadcrumbs, pressing lightly to stick.
- Lay the breaded cutlets on the prepared baking sheet. Drizzle or lightly brush with olive oil—this helps them turn golden and crispy.
- Bake in the oven for about 20-25 minutes. Halfway through, flip the cutlets if you like, or just leave them—both ways work. Look for a golden crust and cooked-through color.
- Check for doneness: the coating should be crispy, and the chicken should be firm and no longer pink inside. Use a probe thermometer if unsure—aim for 74°C (165°F).
- Remove from oven and let rest for 5 minutes. Resting keeps juices locked in, making each bite tender and juicy. Plate and finish with a squeeze of lemon if desired.
Let the chicken rest for 5 minutes on a plate. Finish with a squeeze of lemon or herbs for brightness. Serve warm, ideally with a fresh salad or your favorite sides.
How to Know It’s Done
- Coating is golden and crisp, not burnt or pale.
- Internal temperature reaches 74°C (165°F).
- Juices run clear when cut or pressed gently.
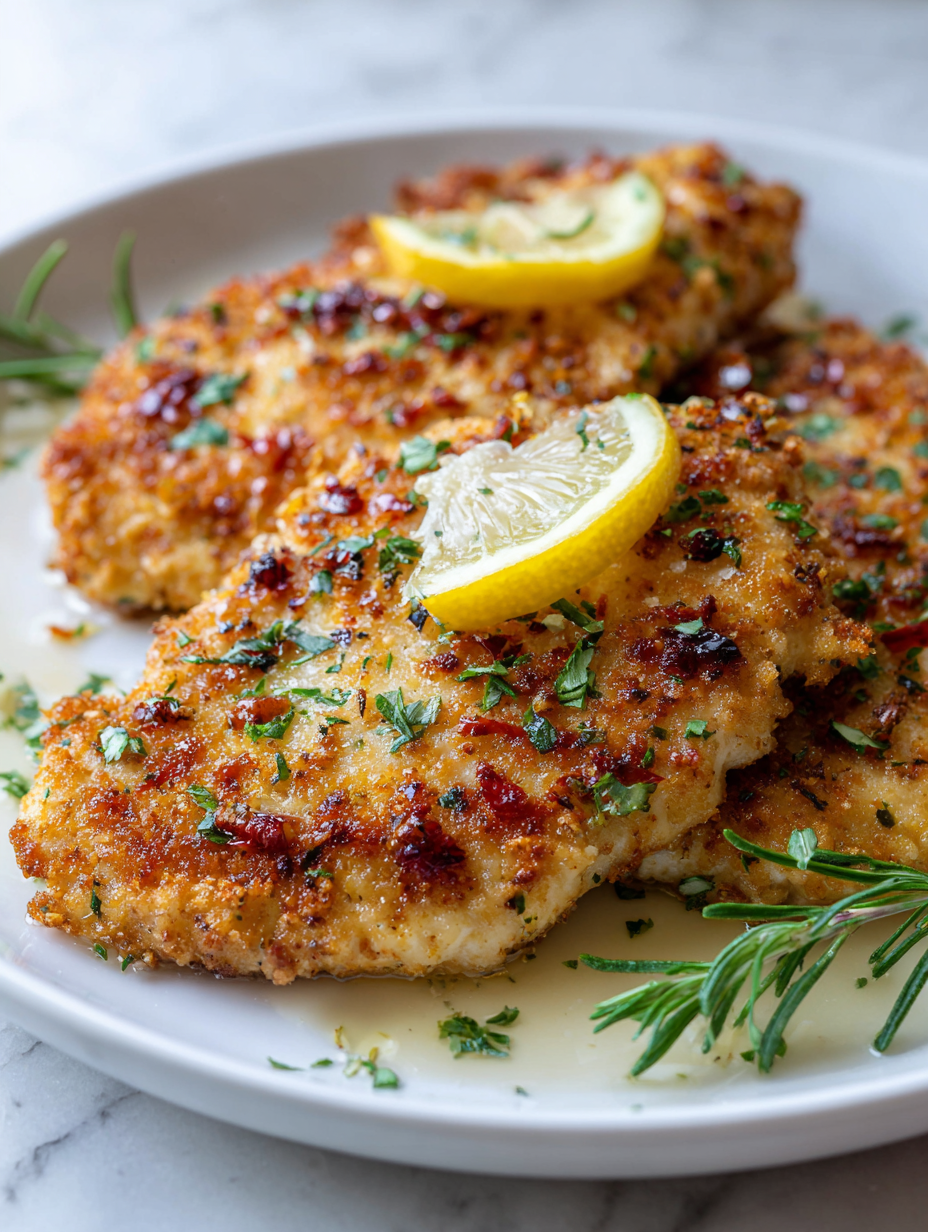
Oven-Baked Juicy Chicken Cutlets
Ingredients
Equipment
Method
- Slice each chicken breast into thin, even cutlets about 1/4 inch thick, gently pounding thicker areas to ensure uniform thickness. This helps them cook evenly and stay juicy.
- Set up your breading station: place the breadcrumbs in one shallow dish, and beat the eggs in another. Mix salt, pepper, and garlic powder into the breadcrumbs for added flavor.
- Dredge each chicken cutlet in the flour (if using), then dip into the beaten eggs, and finally coat thoroughly with the seasoned breadcrumbs, pressing lightly so the coating sticks well.
- Arrange the breaded cutlets on a lined baking sheet, leaving space between each. Drizzle or brush the tops lightly with olive oil to promote golden crispiness.
- Bake in a preheated oven at 190°C (375°F) for about 20-25 minutes, flipping them halfway through if desired. Look for a deep golden crust and no pink inside.
- Once baked, remove the cutlets from the oven and let them rest for 5 minutes. This step helps the juices redistribute, keeping the chicken moist and tender.
- Squeeze fresh lemon juice over the baked chicken cutlets to brighten the flavors and add a touch of freshness. Serve immediately with your favorite sides.
Pro tips for perfect baked cutlets
- coating: Lightly press breadcrumbs onto the chicken for an even, crispy crust.
- Gentle heat: Bake at 190°C (375°F) to keep the cutlets juicy without overcooking.
- Oil brush: Use a soft brush to evenly coat with oil—this promotes golden edges and crispiness.
- Color check: Look for a deep golden hue—if too pale, increase oven time slightly.
- Crackling sound: Listen for a gentle crackle as the crust crisps—don’t remove too early.
- Rest time: Let the baked cutlets rest 5 minutes before slicing to lock in juices.
- Even thickness: Pound chicken to uniform thickness to ensure consistent doneness.
Common mistakes and how to fix them
- FORGOT to preheat the oven → Always preheat to ensure even cooking.
- DUMPED the breadcrumbs too thick → Use a light, even coating for crispiness.
- OVER-TORCHED the chicken → Bake at the right temperature and check often.
- MISSED resting time → Rest chicken 5 minutes for juiciness.
Quick Fixes and Pantry Swaps
- When sauce is too thick, splash in warm water and stir for a quick thin-out.
- If chicken isn’t crispy enough, patch with a quick brush of oil and bake 5 more minutes.
- Splash a little lemon juice if the dish tastes flat after baking.
- When breadcrumbs burn, shield with foil and lower oven temp slightly.
- Dumped too much salt? Rinse chicken briefly and start fresh with less seasoning.
Prep, store, and reheat tips
- You can prep the chicken cutlets up to a day in advance; keep them covered in the fridge to maintain freshness and prevent drying out, especially the coating which can absorb fridge odors.
- Store cooked or baked cutlets in an airtight container in the fridge for up to 3 days. Reheat gently in the oven at 160°C (320°F) until warmed through, watching for crispness to return.
- Frozen uncooked cutlets can be wrapped tightly in plastic wrap and kept for up to 2 months. Thaw overnight in the fridge for best texture before baking.
- Reheating in the microwave can make the coating soggy, so I prefer reheating in the oven; it preserves some crunch and heats evenly. Expect a few extra minutes for reheating, and listen for a gentle crackle when warm.
Top questions about baked chicken cutlets
1. How can I tell when the chicken is done?
Use a meat thermometer to ensure they reach 74°C (165°F). Juicy and fully cooked, but not dry.
2. How long should I bake the chicken cutlets?
Bake at 190°C (375°F) for 20-25 minutes until golden and firm. The coating should be crispy and no pink inside.
3. Do I need to oil the chicken before baking?
Lightly oil the breaded cutlets before baking to get a golden, crispy crust. Use a soft brush or spray.
4. Should I rest the chicken after baking?
Let the cooked chicken rest for 5 minutes. This helps juices redistribute, keeping it tender and juicy.
5. Can I make these ahead of time?
You can prepare the breaded chicken in advance, cover, and store in the fridge for up to a day. Reheat in the oven for best crispness.
6. Can I make this recipe gluten-free?
Use gluten-free breadcrumbs for a gluten-free version. They might be coarser, but still give a nice crunch.
7. What if I can’t use eggs?
Omit eggs if allergic or vegan—try plant-based binders like flaxseed meal mixed with water. Expect slightly less adhesion.
8. How can I make it lower in sodium?
Reduce salt and use unsalted breadcrumbs for a low-sodium version. Add herbs for flavor instead.
9. Can I customize the seasoning?
For extra flavor, add herbs like thyme or paprika to the breadcrumbs. Adjust based on your taste preferences.
10. What if the breadcrumbs burn?
If breadcrumbs burn, shield with foil and lower oven temperature slightly. Keep an eye on the color as it bakes.
This baked chicken cutlets recipe is a quiet staple that I keep coming back to. It’s honest, simple, and always hits the spot without fussing over overly complicated techniques. Sometimes, it’s just about the smell of toasted breadcrumbs and the tender, juicy bites that make the kitchen feel warm and familiar.
In a world of fast fixes, this dish reminds me that good food doesn’t need to be complicated. It’s a little moment of satisfaction, a reliable go-to when I want something nourishing and straightforward. No matter the season, it feels like a small, honest win every time I serve it.